While firewalls like OPNsense and pfSense are great, I’m not fond of them. While FreeBSD, the OS that OPNsense and pfSense are built on top of, is incredibly secure and stable, each of these firewalls are anything but lightweight. They run PHP as well as a web server to serve that PHP interface. These extras need CPU and RAM and are susceptible to vulnerabilities. Nothing like trying to patch a firewall because of a PHP zero-day or a zero-day in the web interface from your vendor.
Command line is best. Enter VyOS.
For a long time now, VyOS has been on my radar, but I’ve never really gotten hands on with it until now.
Embrace the CLI
One of the reasons why I don’t think VyOS is popular as it could be is that it doesn’t have a flashy GUI. It’s all terminal here, baby! Me likey! There’s nothing flashy about VyOS.
This is where VyOS shines. You don’t have to worry about a web server crashing (which I have experienced with pfSense). You don’t have to worry about insecure PHP/CGI code. And since the router doesn’t have to do double duty as a web server and compiling PHP code, it actually can do a lot more with a lot less. It doesn’t need a lot of CPU or RAM to function. Heck, you don’t even need a lot of disk space, either. A critical piece of networking equipment, physical or virtual, should be as simple as possible.
VyOS Quick Start
Something I struggled with was finding a good guide. I guess this means that for a change I get to write one!
Installing VyOS
To install VyOS, you’ll need an ISO. Keep in mind that VyOS only provides ISOs for the nightly development build (rolling distro) and the previous LTS version. The current version you will either need to find someone who has built the ISO (and trust them) or get a VyOS subscription (either by purchasing one or by contributing to the project).
Once you have an ISO, you can load it in your hypervisor or load it on a flash drive and turn an old PC into a powerful router. By default VyOS will boot into Live Mode. Yes, you can run VyOS completely in memory! But chances are, you want the install to persist. So once you get booted up, login with the user vyos and the default password vyos. You will then issue the command install image and then go through the installer. Here’s an example:
vyos@vyos:~$ install image
Welcome to the VyOS install program.  This script
will walk you through the process of installing the
VyOS image to a local hard drive.
Would you like to continue? (Yes/No) [Yes]: Yes
Probing drives: OK
Looking for pre-existing RAID groups...none found.
The VyOS image will require a minimum 2000MB root.
Would you like me to try to partition a drive automatically
or would you rather partition it manually with parted?  If
you have already setup your partitions, you may skip this step
Partition (Auto/Parted/Skip) [Auto]:
I found the following drives on your system:
 sda    4294MB
Install the image on? [sda]:
This will destroy all data on /dev/sda.
Continue? (Yes/No) [No]: Yes
How big of a root partition should I create? (2000MB - 4294MB) [4294]MB:
Creating filesystem on /dev/sda1: OK
Done!
Mounting /dev/sda1...
What would you like to name this image? [1.2.0-rolling+201809210337]:
OK.  This image will be named: 1.2.0-rolling+201809210337
Copying squashfs image...
Copying kernel and initrd images...
Done!
I found the following configuration files:
    /opt/vyatta/etc/config.boot.default
Which one should I copy to sda? [/opt/vyatta/etc/config.boot.default]:
Copying /opt/vyatta/etc/config.boot.default to sda.
Enter password for administrator account
Enter password for user 'vyos':
Retype password for user 'vyos':
I need to install the GRUB boot loader.
I found the following drives on your system:
 sda    4294MB
Which drive should GRUB modify the boot partition on? [sda]:
Setting up grub: OK
Done!
Once you get the “Done!” message, you can then remove the media and reboot.
Configuring VyOS
Once your router comes back online, you can connect to the console and begin configuring.
Login as the vyos user and the password you set during installation.
To get into configuration mode, you will need to issue the command configure and press enter. You’ll notice the prompt will change from a $ to a #.
Let’s start by configuring the network interfaces. Use the following commands:
set interfaces ethernet eth0 address dhcp
set interfaces ethernet eth0 description 'WAN'
set interfaces ethernet eth1 address '192.168.0.1/24'
set interfaces ethernet eth1 description 'LAN'
If your WAN interface has a static connection, replace dhcp with the IP address in CIDR notation. For example, 100.64.12.22/29.
Now, let’s setup a DHCP server on the LAN side.
set service dhcp-server shared-network-name LAN subnet 192.168.0.0/24 default-router '192.168.0.1'
set service dhcp-server shared-network-name LAN subnet 192.168.0.0/24 name-server '192.168.0.1'
set service dhcp-server shared-network-name LAN subnet 192.168.0.0/24 domain-name 'vyos.net'
set service dhcp-server shared-network-name LAN subnet 192.168.0.0/24 lease '86400'
set service dhcp-server shared-network-name LAN subnet 192.168.0.0/24 range 0 start 192.168.0.9
set service dhcp-server shared-network-name LAN subnet 192.168.0.0/24 range 0 stop '192.168.0.254'
Now, you will probably want to setup a DNS forwarder. Use the following commands:
set service dns forwarding cache-size '0'
set service dns forwarding listen-address '192.168.0.1'
set service dns forwarding allow-from '192.168.0.0/24'
You can adjust cache-size 0 later on. The value 0 means that VyOS will not cache DNS results.
Now you want to setup a NAT rule so that your inside traffic can access the Internet and share your router’s public IP.
set nat source rule 100 outbound-interface 'eth0'
set nat source rule 100 source address '192.168.0.0/24'
set nat source rule 100 translation address masquerade
To protect your network, you’ll need some firewall rules. Here’s a basic set to get you started:
set firewall name WAN-IN default-action 'drop'
set firewall name WAN-IN rule 10 action 'accept'
set firewall name WAN-IN rule 10 state established 'enable'
set firewall name WAN-IN rule 10 state related 'enable'
set firewall name WAN-LOCAL default-action 'drop'
set firewall name WAN-LOCAL rule 10 action 'accept'
set firewall name WAN-LOCAL rule 10 state established 'enable'
set firewall name WAN-LOCAL rule 10 state related 'enable'
set firewall name WAN-LOCAL rule 20 action 'accept'
set firewall name WAN-LOCAL rule 20 icmp type-name 'echo-request'
set firewall name WAN-LOCAL rule 20 protocol 'icmp'
set firewall name WAN-LOCAL rule 20 state new 'enable'
VyOS firewall has 3 zones that rules can be applied to: in, local, and out. In means traffic coming into that interface and out means traffic leaving the interface. Local is a little confusing, but it means traffic for the firewall. You can name your firewall rules whatever you would like and decide the numbering scheme. Remember, firewalls process rules from top down. A rule with the ID 1 will be processed before the ID 10 and the ID 100.
To explain these rules, WAN-IN rule set will be applied to the WAN interface on traffic coming in. By default, we’re blocking everything. Then, we create a rule with the ID 10. This will accept established and related sessions. Without this rule, your devices will be able to talk to the Internet, but traffic won’t be allowed back in. On WAN-LOCAL, rule 10 does the same thing – allows established and related sessions. You’ll notice rule 20. This allows ICMP on the WAN IP address. If you don’t want your router to respond to ping, you can omit this rule but it’s good to have initially for troubleshooting.
Now here’s where I ran into issues – how to apply the firewall rules will depend on what version of VyOS you are using. If you’re using the latest LTS version (1.3.3 as of this writing) or older, or a rolling build earlier than September 2022, you’ll use the following command:
set interfaces ethernet eth0 firewall in name WAN-IN
set interfaces ethernet eth0 firewall local name WAN-LOCAL
If you’re using a rolling build later than September 2022 (1.4) or a future LTS version, then the syntax changed. You will then use the commands:
set firewall interface eth0 in name WAN-IN
set firewall interface eth0 local name WAN-LOCAL
At this point, if you have a DHCP WAN connection, your VyOS router is almost ready to go! If you have a static connection, you’ll need to add the default route in order to connect it to the Internet (or upstream network). Use the following command to set a static default route.
set protocols static route 0.0.0.0/0 next-hop 100.64.12.20Now that you have everything staged, you need to commit your changes. You can do this with the commit command. If there are any problems, commit will tell you about them and probably reject them. But if everything is good, it should just take a second and you’ll be returned to another command prompt. At this point, your changes are live. Try to access the Internet from a device from behind the VyOS router. It should work. But, just like Cisco routers, you need to save your configuration otherwise if your VM was to reboot or shut down, you’d lose all your settings. Saving is as simple as typing save and pressing enter.
Tips, Tricks, Helpful Information
- Commit more frequently. In this guide, I waited until the end. Best practice, from what I can tell, is to commit after every “block” (e.g. once you configure the interfaces,
commit. Once you create a firewall rule,commit. - To save typing long lines multiple times, enter edit mode. Edit will allow you to edit at a certain level in the configuration (for example, interfaces > ethernet > eth0 is 3 levels from the top. If you type in edit interfaces ethernet eth0 and press enter, you can then type in set address …, set description … and these commands will apply at this level. To navigate to another level or to get back to the top, just type exit. The prompt will also show you where you’re at.
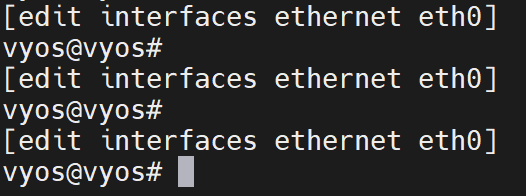
In this example, you can see the prompt has [edit interfaces ethernet eth0] above it letting me know that this is where I’m currently editing in the config. If the prompt just has [edit], then I am at the top level.
- To remove a line of the config (or even delete an entire block), use the
deletecommand. This is like Cisco’snocommand. For example, to change the IP address on the LAN interface, I would issue the commanddelete interfaces ethernet eth1 addressand thenset interfaces ethernet eth1 address 192.168.1.1/24 - Leave space in your firewall rules! This can require some planning, but since plans change, you’ll be glad you left yourself room. E.g. don’t number sequentially like 1, 2, 3, 4, etc. You’ll make things harder for yourself. Instead, start with 10 and increment in 10s. For example: 10, 20, 30, 40, etc. If you find you need to place a rule between 10 and 20, it’s as easy as giving the rule ID 11.
- You can rename and copy blocks. I picked this up from the VyOS blog. Let’s say in the WAN-LOCAL rule set, you want to deny SSH access for everyone but allow it for certain IPs but you already have a rule to block all SSH access at ID 20. Since rules are processed top down, you need to put your new allow rule above your deny all rule. But how do you move rules in a CLI? To do this, go into
editmode and then navigate to your rule set:edit firewall name WAN-LOCAL. Once there, run the commandrename rule 20 to rule 30. Now you can exit exit mode and create rule 20 to allow your authorized IPs for SSH. Likewise, you could runcopy rule 20 to rule 30and then edit rule 20. - If you’re running VyOS on Proxmox, do yourself a favor and when you create the VM, add a serial port (under hardware). This way, you can SSH to your Proxmox host, run the command
qm <VMID> terminal(example:qm 100 terminal, just replace 100 with your VyOS VM’s ID) and Proxmox will connect you to the serial terminal over your SSH session. You don’t have to open SSH on VyOS and you always have an easy-to-access console if you’re like me and mistype IPs and then accidentally take down the entire company’s network and you have to drive to the data center to reboot the core switch to undo your fumble… not that I have experience or anything. As long as your Proxmox host has connectivity, you can reach your VyOS router!